OBS REMOTE
OBS (Open Broadcaster Software) is free and open source software for video recording and live streaming.
OBS Remote is an Application that allows you to control some of the common features of OBS from another device, typically a phone or tablet.
- Scene Selection Buttons - Add selected scene buttons to your remote control so that you can quickly switch between them during a recording or live stream. Each button on your remote can be customised with a colour and icon to help you quickly identify it
- Recording & Streaming Buttons - Add Recording and/or Streaming buttons to turn off/on OBS’ recording or streaming
Note: Currently OBS Remote does NOT support Scene Collections. If you like OBS Remote and would like me to add more featues then please let me know
Installing OBS REMOTE
Before you can use OBS Remote you must install Web Socket add-in and enter the connection details into OBS Remote. This guide will take you through that. ** NB Make a note of the port number your use during the installation **
Add Web Socket Add-In to your OBS Installion
OBS REMOTE requires a Web Socket add-in to installed on OBS. You can install OBS Web Socket for Windows, Mac or Linux.
Install OBS REMOTE for your Device(s)
You can download OBS REMOTE from;


- TBA Windows Store
- TBA Apple Store
Connecting OBS REMOTE to OBS
Once you have installed the Web Socket add-in you can connect it to OBS Remote.
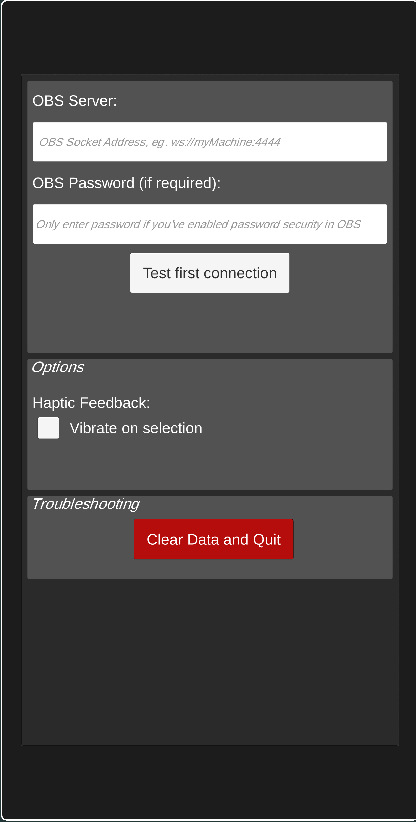
Connect to OBS
To connect to OBS you need to supply the address of the machine OBS is running on together with the port you used to install the Web Socket add-in. Typically the address will just be the same name as the machine OBS is running and the default port will be 4444. For example, if your machine name is JUPITER then the address you need to enter is (you must include the ws:// at the front); ws://jupiter:4444
NB. Some devices, such as Amazon Fire tablets, do not use your networks naming services. If this is the case then you cannot use the name of your computer, you must find the IP address instead. E.g. JUPITER’s address is 192.168.0.4. So the address would be ws://192.168.0.4:4444
If you have configured Web Socket add-in to use a password then you should enter that too.
When you have entered connection details for OBS you can select the Test first connection button. Make sure you start OBS before you attempt to connect. If the connection succeeds then you can move onto Customising your OBS Remote.
Customise OBS REMOTE
By default OBS Remote will provide a default Scene-Icon for each scene that is currently available in your OBS App.
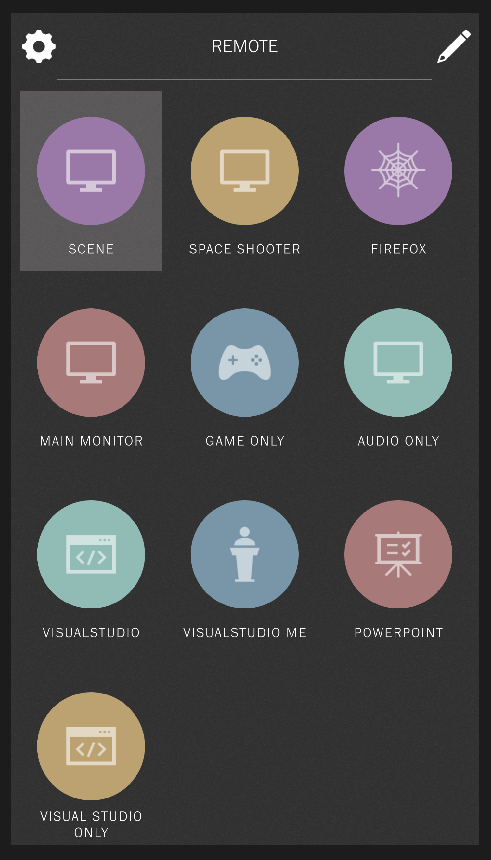
Example Portait View
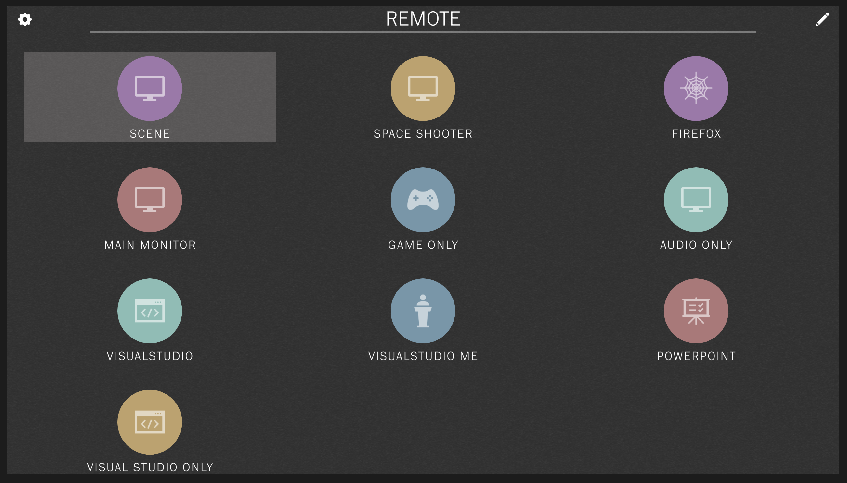
Example Landscape View
The size of the icons will depend on the number of scenes you have. The default ordering of the icons reflects the order of the scenes in OBS. However, both of these can be customised.
Customise the Order
You can change where the icons appear on the remote by tap-and-holding (or click-and-hold) the icon and dragging it over another icon. The two icons will swap places.
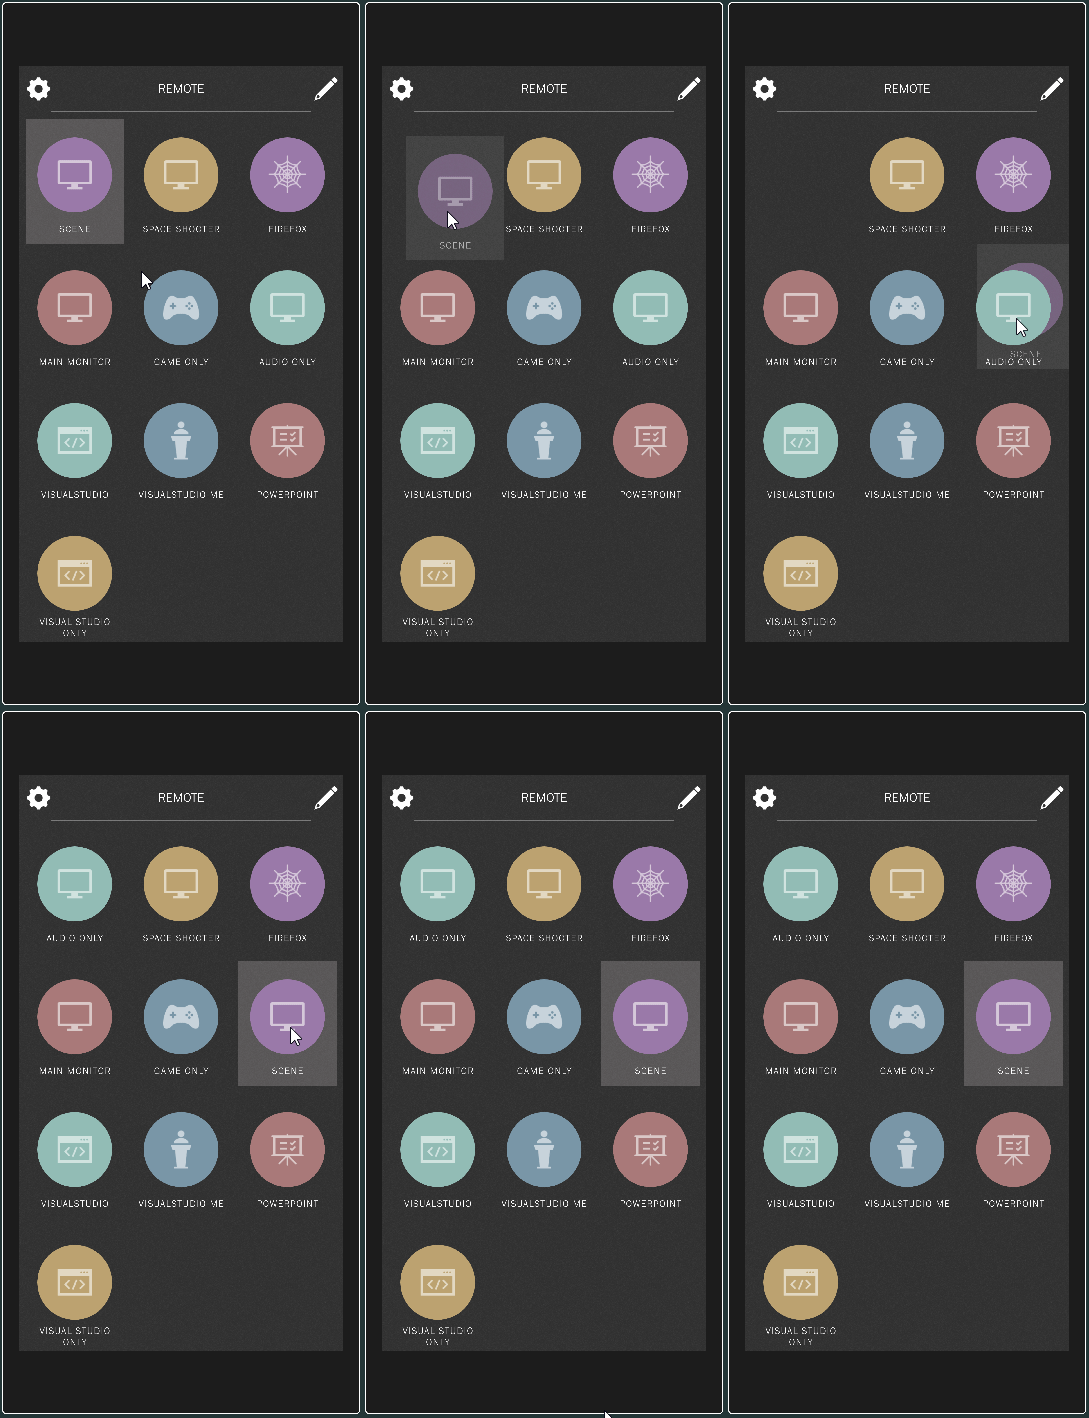
Reordering
Customise a Scene Icon
You can change the appearance of the Scene Icons to help you more easily find them on your OBS Remote.
- Select the Pencil edit icon to enter Edit Mode
- Select the Scene you want to customise
- Make the changes you want and press the Save icon
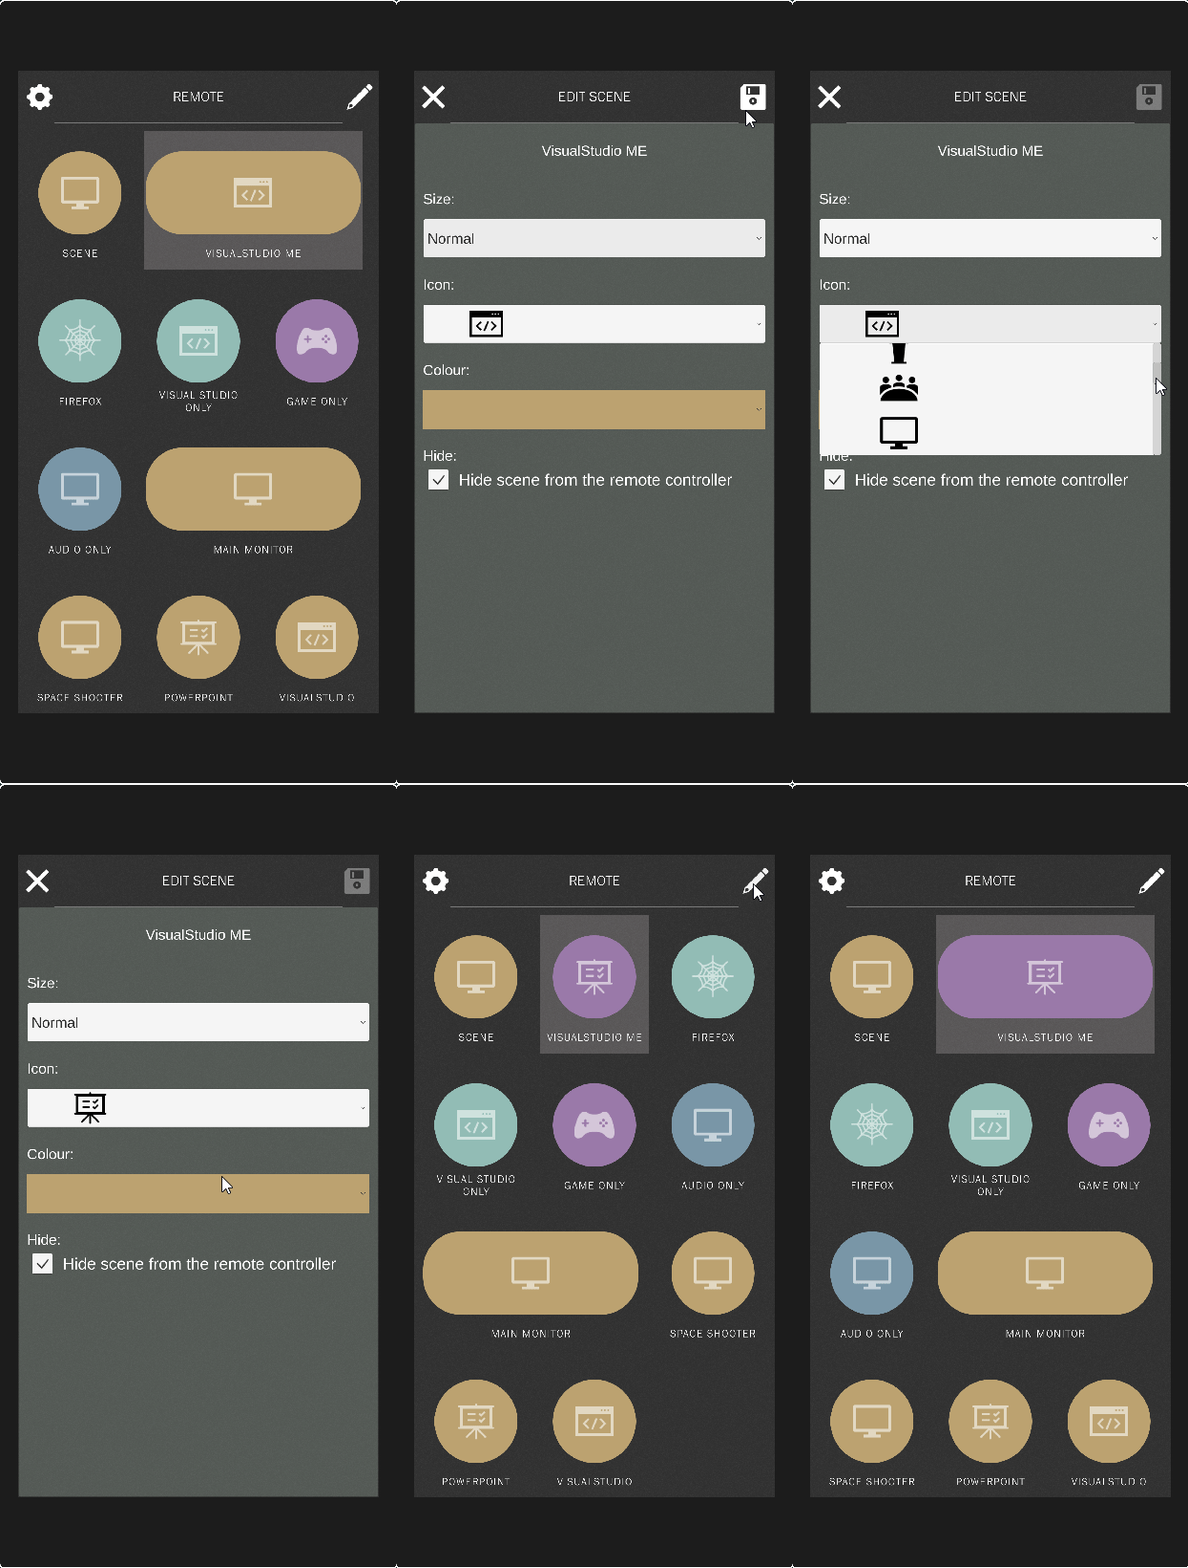
Customise Scene
Troubleshooting
If you have problems using OBS Remote then please see read the following guide, or you can contact me
I cannot get the Remote to Connect
- Make sure OBS is running.
- Double check that the address in the Setup page (the gear/cog) matches the name of the machine running OBS
- Make sure the device running OBS Remote is on the same network as the machine running OBS. E.g All on the same 5Hz local network
- If you are using the Name of the machine in the address, try the IP Address instead.
- Make sure you have installed the Web Socket add-in into OBS
For Windows users, ensure the OBS server and your devices are all on the same Windows security network (typically to avoid Firewall problems this will be ‘Private Network’)
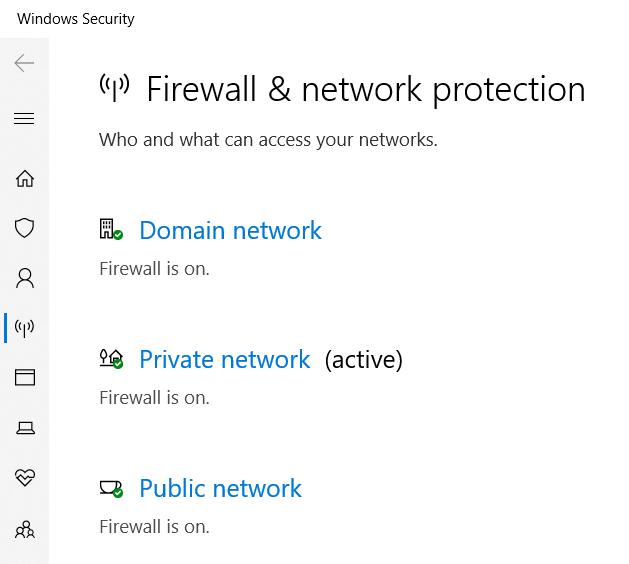
Windows Security
Scene-Icon Problems
I select an Icon but the scene doesn’t change
This typically happens if you have renamed the scene in OBS. Normally you can go into the Scene Manager and hide the old named scene and un-hide the newly named scene.
I don’t see a Scene or Record or Streaming icons on my remote control
Go into the Scene Manager and ensure the Scene/Function you want is checked. Pencil->Plus/Minus
The double-size icon is not taking up two places
The double-sized icon is a feature that is still under development and there are still a number of inconsistencies.
- If a double-sized icon is too close to the edge it will not expand itself to full width. You can either edit the size to single width or reorder the icon
- If the result is just ugly and reodering doesn’t help then change the size back to Normal and contact me
It’s just not working
It is possible for OBS Remote to get into trouble, just forcing the app to close and restart it. If you still have problems then you can remove all your customisations and start again by selecting the Setup Cog/Gear and choosing Clear Data and Quit. Warning, once you press this you will have to enter the connection details again.
Reporting Errors
When an error occurs OBS Remote will present you with an Error Reporting screen. It might not fix your problem now, but if you share the details then I will have the opportunity to fix it. Or if you do not wish to send the data you can to contact me directly.
Credits
Thanks to the following GameDevHQ stars for helping to localise the app;
- Español/Spanish - Rehtse Studio
- Français & Canadien/French & French Canadian - Mickplouffe
- Deutsche/German - Silvija Jung
- Norsk/Norwegian - Kenneth Skodje
Thanks everyone.
